Tuesday, 2 February 2016

Make-up Technical File- The clean catwalk face: foundation - dewy vs matte


DEWY VS MATTE
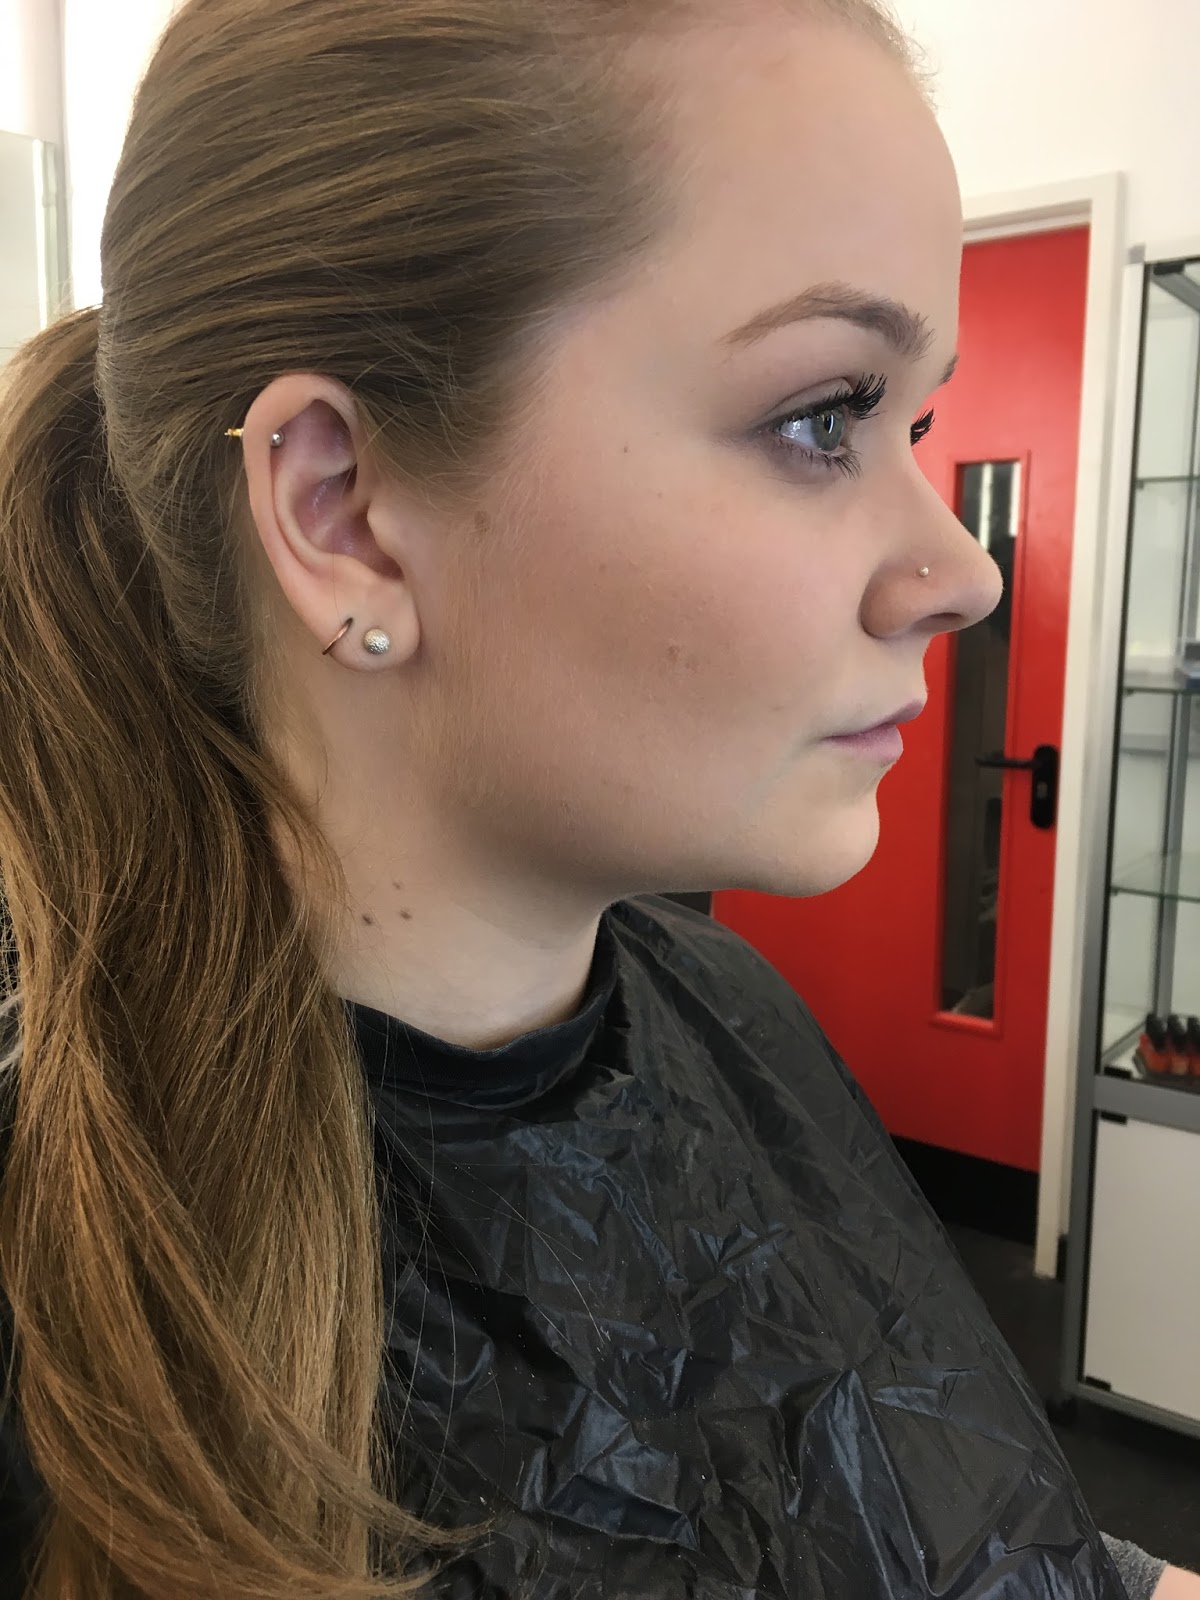
Dewy and matte are two complete opposite skin looks and in our first make-up session we were creating both. We started off with creating the matte look first and then the dewy afterwards, we had different photos from catwalks on the mirror to give us an idea of the finish look. Fenella also had this amazing American book/magazine which was called Beauty and each page had multiple different looks on models by Designers and gave us great visual help with our looks and also inspiration. 

|MATTE|
  • Laura Mercier primer
  • Simple face moisturiser
  • Collection Illuminating touch brightening concealer
  • Revlon colorstay foundation 150 buff
  • Ben Nye powder 
  • Illamasqua duo sculpting powder
  • Mac pink powder 
I started with using toning water on the skin with cotton pads just to make sure my model had now excess make-up on her face so I can start with a clean canvas. I then applied a small amount of moisturiser to the skin before starting to make sure its hydrated which will be better for the application. Firstly I applied primer all over the face and then used the brightening concealer under the eyes to make them pop and hide any tired or dark eyes. I then applied the foundation over the face and down the neck and blended it completely into the skin, I then used the Ben Nye white powder on the face to completely set the look and create the matte finish. I wanted to add a little bit of definition to the face so I lightly applied the sculpting powder to the cheekbones and the corner of the top of the forehead. To brighten up the look I applied the MAC pink powder to the apples of the cheeks to add warmth, all theses powders are matte to create a matte flawless finish. 


|DEWY| 

  • Laura Mercier primer
  • Simple face moisturiser
  • Collection Illuminating touch brightening concealer
  • Revlon colorstay foundation 150 buff
  • finishing oil
  • mac strobe cream
  • Benefit highlighter
Next was the dewy look so I used the toning water and cotton pads to take off the matte look so we can start fresh. Once all the previous make-up was off I applied moisturiser to the face and neck. I then started the look with primer and added the brightening concealer under the eyes. Over the whole face I applied MAC strobe cream as it gives an amazing highlight all over before the application. I then used the oil to highlight certain areas of the face such as the forehead, nose, cheekbones and chin. I then mixed the foundation with the oil and blended it in to the whole face and down the neck. I finished off the look with highlighting powder which you can wet your brush down before and apply on the forehead, cheeks, nose and chin to catch the light.

This is the first time I have created a dewy skin and I do love the glowing look and the beautiful reflection it gives. I always have the need to matte everything down so when I see shine my powder comes straight out so I think it went well for my first attempt at creating dewy skin. I think dewy skin for catwalk and editorial is very in at the moment and I think I would personally like to take on a new look for myself and maybe try dewy skin more on looks. I think my best outcome was my matte only because I have had more practise and my finishing look is better. I enjoyed creating the dewy look because it was interesting giving a different finish and playing around with different products, including the textures and application. I think I need to concentrate more on highlighting the high points of the face and really conquering the technique allowing it to reflect in the light.

Prepping the skin for healthy looking skin to achieve the best results If you have the time, use face-masks to create the best canvas (can be homemade and natural) or leaving moisturiser to sit and soak in the skin,especially if dry/ dehydrated skin. 

Consultation to assess type of skin: Oily skin: oily skin can still be made up to have a beautiful dewy finish - think about using a matte foundation mixed with a highlighter or liquid illuminator in areas where you want the glow - start with matte in the centre with the highlighting products more towards the outer face. Start lightly, keeping it looking natural for a radiant finish, avoiding highlighting any pores. 

Pointers for creating Matte/Dewy skin with different products - focus on the skin!
Tools - experiment with damp brushes or sponges to create different finishes (damp, dry) a damp sponge will help the product into the skin.

Serums and Moisturisers - always prep and prepare the skin when focusing on beautiful skin. Use a tinted moisturiser before you start any foundation or concealer coverage for an extra glow. 

Primers - building your canvas to work with. Use a mattifying primer if the skin is oily. Blending out the product - not using too much product and don't leave any harsh lines. 

Concealers - applying after the foundation where needed to the shadowed areas on the face and to any imperfections. 

Foundations - not always necessary to apply all over the face -apply in the centre/forehead and blend out for a more flawless natural finish. Don't use too much product - catwalk fresh finish!


DEWY SKIN
http://www.fashionmagazine.com/wp-content/uploads/
2015/05/dewy-skin-trend-07.jpg

MATTE SKIN 
http://2.bp.blogspot.com/-c1JQ1SJPNTA/VMKi8t8EIvI/AAAAAAAA
BKM/wPEAm-2J-gw/s1600/tory-burch-make-up-ss15-8666-imaxtree__large.jpg


http://puteri.net.my/wp-content/uploads/2015/02/dewyvsmatte.png


Monday, 1 February 2016

SUPER SKIN Gucci spring/summer 2010


Super Skin

  • 29 SEPTEMBER 2009
  •  
  • Vogue
    Gucci spring/summer 2010 © James Cochrane
    Picture credit: James Cockrane


    The Gucci girl has had a make-under, and we think she looks all the better for it for it. Her skin is gleaming and dewy, and there is little else going on bar some definition on the eye. Other shows also made 'hyper-real' skin their focus: at Blumarine the look was a sun-kissed, sculpted complexion, whilst the girls at MaxMara had been relaxing pool-side with glossy, natural skin and slicked back hair. With all this lightness in make-up - remember yesterday's post about the paring down of Versace's smouldering eye - do we spot a trend? - Jessica Hogan, Vogue Junior Health & Beauty Associate.


    http://www.vogue.co.uk/beauty/2009/09/29/super-skin

      •        


            • Photos from: 
              http://www.vogue.co.uk/fashion/spring-summer-2010/ready-to-wear/gucci


              Dewy skin has been an uprising look over the past few years and has become even more popular recently in the latest catwalk. The glowing skin and pearl highlighter has hit the catwalk and the high street with people trying to get the best buys for glowing skin and highlighters and what brands sell the best. Social media has gone crazy for the dewy look which could only be adding a serum product to your foundation and finishing the look with highlighting areas of the face.

              Gucci spring/summer 2010, (which didn't feel too long ago) could of started a trend with a light application of make-up and gleaming skin. This is definitely a start of a new craze and can be applied in so many ways and the glowing dewy skin can be as glowy as you want. Dewy skin started off mainly on models for catwalks however it has become more high street and more people are creating the look day to day. Usually anything shiny tends to be needing to powder that area of the face however it is the new craze.


              Stylist magazine- wet dewy skin


            • BEAUTY
            • Skin Is In: The Products


              • 18 FEBRUARY 2015
              •  
              • Lisa Niven
              •  


              • GLOWING, flawless-looking skin has never enjoyed more time in the spotlight, and the new way to sport it for spring/summer 2015 is dewy, radiant and fresh. From the subtle glow at Stella McCartney, to the gloss textures at Marc by Marc Jacobs and Donna Karan, this time it's about cleverly placed illumination to highlight, and subtle blurring and concealing products to perfect. Powders? No thank you. See the must-have kit here. 


                Picture credit: Indigital 

                | 4 Super Products | 

              • Dior 


                Fresh for 2015, Dior has created an entire new Diorskin Nude Air collection to make a barely-there look even more achievable. The highlight is the ultra-lightweight Diorskin Nude Air Serum, a blendable and sheer fluid make-up with cranberry oil for extra radiance. Dior Diorskin Nude Air Serum, £33. Available at www.selfridges.com.


            • Clinique 

              Highlighting made as easy as it could possibly be - Clinique's chunky Chubby Stick Sculpting Highlight can be scribbled onto cheeks, the bridge of the nose and forehead for flattering beams of light on the face. Clinique Chubby Stick Sculpting Highlight in Hefty Highlight, £19. Available at www.clinique.com.


            • Yves Saint Laurent 

              The balm-textured Blur Perfector is the latest addition to Yves Saint Laurent's famous Touche Éclat range, which translates as "radiant touch". Worn on just-moisturised skin it perfects and diffuses light for a softly luminous finish, or as a make-up top-up throughout the day it blurs enlarged pores and hides excess shine. Yves Saint Laurent Touche Éclat Blur Perfector, £29.50. Available at www.harrods.com.


            Lancôme

            For those nervous about getting a caked-on effect from their foundation, Lancôme’s new Miracle Cushion may well be the answer. Dispensed via an innovative “sponge” compact (the concept has been around for a while in Korea, but is new to the British market), this air-light formula is buildable, sheer and dewy in its finish – basically, it’s hard to go wrong. Lancôme Miracle Cushion, £29.50. Available at www.lancome.co.uk


            http://www.vogue.co.uk/beauty/2015/02/18/skin-is-in---highlighters-primers-blurring-products

          •  
    •  


Hair Technical File- Blow Drying: Creating volume with hair

| Blow Drying |

In our first practical session of the unit we started with hair and the art of blow drying. Blow drying I feel is a very valuable skill and is used often in the salon and for a lot of hair styles. I have never had any previous experience with blow drying and have always wanted to be shown how to correctly do it. I have attempted to blow dry before with no previous experience and found it quite difficult holding a brush and hair dryer at the same time as I wanted both equipment to be in my right hand. I was super excited to learn the technique of blowing drying and we started off with a demonstration by the lovely Lottie. The first demonstration was creating a lift at the root and then curling the hair at the end or creating a flick like effect with a rounded brush and the second style was body at the root and finishing with a sleek more straight ended with either a paddle brush or denim brush.

Equipment:
  • Shampoo and Conditioner (if washing the hair)
  • Hair dryer
  • Heat protector
  • Mousse
  • Sea salt
  • Comb (wide)
  • Round brush
  • Clip
  • Grips
  • paddle brush
  • denim brush
  • shine spray
  • hair spray
  • Pin tail comb
  • Towel
I started with washing the hair so I took my Kate head over to the skin basins and washed it thoroughly with shampoo and then applied conditioner. I then used a towel to cover the hair and dry it through so there is no excess water dripping. I then put my Kate head on the stand of the edge of the seat so I could stand and making sure her head is at the right height for me. I then used the towel again to dry through the hair making sure its not dripping wet and able to work with. When combing through the hair you don't want to use a brush because it can break the hair
and the elasticity of the hair and a comb is much better for the hair. I used a
large comb with wide teeth so I can comb through and untangle any knot's.
I then used a heat protector on the hair which I sprayed all over and brushed into the hair, next was mousse which makes the hair easier to shape, I used a small amount in the palm of my hand, you don't want a sticky mousse because otherwise it can be difficult to work with. Next was applying sea salt to the hair which you spray from mid length to the ends of the hair and then I used my fingers to comb through the hair and then used a towel to wipe my hand in before using the hair
spray.

Once all the products were on the hair and it was all prepped for blow drying I sectioned the back off. I wanted to do half flicking and curl with the round brush and the other with body and straight so I sectioned the hair down the middle first. I started on the left side and section the top part us creating a diagonal line with my comb, and making sure the section isn't bigger than the brush itself and I then clipped the rest of the hair up. I got a hair dryer and put a nozzle on the end of it which gives the air flow direction when drying. I then got the round brush and put it under the hair and placed my thumb over in the centre and with the brush start brushing up lifting at the root and start blowing drying from the top, and then under, then working to the ends and finally wrapping the hair up in the brush and powering the hair dryer over it creating the curl at the end and unwinding the brush letting the curl fall. After the first section was done I then got a grip and wrapped the curl up and gripped it into place and started on the next section up, working up the side of the hair and finalising with the centre. It was just over half way through the lesson and I started on the other side because I wanted to make sure I was able to attempt both blow drying techniques. I started with taking the bottom section diagonally and I decided to use my paddle brush for this straight technique, I place the brush
under the hair blowing drying on top lifting the brush up, drying under, then working through the mid section and finalising with the end giving it direction. I then took the next section up and started working my way up the hair blow drying each section using the paddle brush, giving lift at the roots and directing the hair downwards. I worked my way up the hair until half the head was complete and I then used a hair shine spray all over the hair and then hair sprayed at the roots and gave it a slight back comb to give extra volume.


Overall evaluation

I felt the hair technical session was very successful and I have definitely improved my blow drying skills. To begin with I couldn't figure our which hand to hold the hair dryer and brush In however I soon figured out which one I was more comfortable in what hand. I think out of the two blowing drying techniques I felt I was better creating the body at the root and the sleek ends with the paddle brush I think the rounded brush was a little harder to grasp the technique as I kept getting the hair caught in it slightly. I think blowing drying is a very useful skill and I want to practice it more so I can get the technique perfect and be able to flow with the brush and the hair dryer. I think I definitely need more time practising the body curl/wave style with the rounded brush to perfect it, I really liked it when Lottie came round and was able to show us one to one the technique and the direction of the brush and hair dryer.


Health and Safety:
  • Be careful when blow drying hair as hair can become very hot and so can the brush
  • Make sure there is a vent at the end of the hair dryer because hair can get caught in it
  • Be careful with trailing wires
  • Make sure bags and coat are kept out of the way causing no trip hazard
  • keep work area tidy


Thursday, 28 January 2016

Unit and Project Introduction

This unit aims to develop the students understanding of how make-up and hair design concepts for fashion and beauty are developed from idea conception through to realization. The outcome produced for this unit is to be an advertising campaign for your given beauty brand. Emphasis will be placed on the research and development of ideas and will engage students in a deeper understanding of the practical and theoretical approaches required to produce innovative visual outcomes. Students will be expected to build on existing technical skills and theoretical knowledge from Level 4, producing work to a professional standard for an identified fashion and/or beauty market.

Through an employability-focused approach, students will be also introduced to the diverse roles of the make-up and hair artist/designer across editorial, advertising and fashion arenas. The unit, with particular emphasis on the timed assessment, will encourage students to develop key transferable skills in communication, collaboration and negotiation.

Beauty and the Brand – Portfolio
 The Brand: You will be required to research and define a specified make up brand. This will include the 5 P’s – Product, Packaging, Presentation, Promotion and Price Point. As part of your definition you will be required to create a research/sketch blog, to show your visual and written research as well as any test shots and final images. You will also be required to write a 500-word evaluation of your brand. It is envisaged that the understanding of your, and the brands of others in your group will give you a body of background knowledge essential to grasp why the brands and products available in retail today are so popular. You should attend all technical, seminar and lecture sessions, documenting and reflecting upon feedback from tutors to show your commitment and development of ideas. It is anticipated that the management of this project will help you to start working more independently in preparation for your final year of the degree.
The Beauty: Your research has to include visual investigations that reference the fashion/beauty ideals and trends discussed in the sessions. This will allow you to put the theme of beauty in context using make-up ideas in the form of design templates and work in progress styled examples. The concept development must reference your design ideas, presented in a coherent and logical format but it must also highlight your technical skills.
To support your understanding of Brand’s identity and beauty, you are required to construct 6 Beauty Images that evidence the advanced and refined technical skills learned within this unit. You need to shoot: 
  • 2 Advertising images – Day & Night looks 
  • 2 Editorial looks – Mini spread exploring the theme/story behind the catwalk 
  • 2 Catwalk looks reflecting your chosen brand and the Spring/Summer 2016 trends.


Choosing a brand-
For the branding section of the unit we have a choose a make-up brand from the given list:
  • ILLAMASQUA 
  • BOBBI BROWN 
  • YSL 
  • LAURA MERCIER 
  • DIOR 
  • REVLON 
  • ELLIS FAAS 
  • CHANEL 
  • TOM FORD 
  • SHISEIDO 
  • CHARLOTTE TILBURY 
  • NARS 
  • MAX FACTOR 
  • LANCOME 
  • MAC 
  • GIVENCHY 
Once we have chosen a brand the unit beauty and the brand will correspond to the brand and in depth research such as packaging, advertising, style, editorial looks, catwalk, what magazines are they in and target audience etc. The brand will then connect with our 6 final images for the two advertising images, two editorial and two catwalk all based around and inspired by my chosen brand. I'm really looking forward to getting myself stuck into this unit as I love fashion and beauty and I'm excited to research a specific brand and reflect my research and ideas into my final images.  

Illamasqua Christmas Ad
Illamasqua-Christmas-collection.jpg

Katie Holmes for Bobbi Brown
celebrities/katie-holmes/images/katie-holmes-bobbi-brown-makeup-lg.jpg

YSL: Beauty: Ad Campaign Spring/Summer 2011