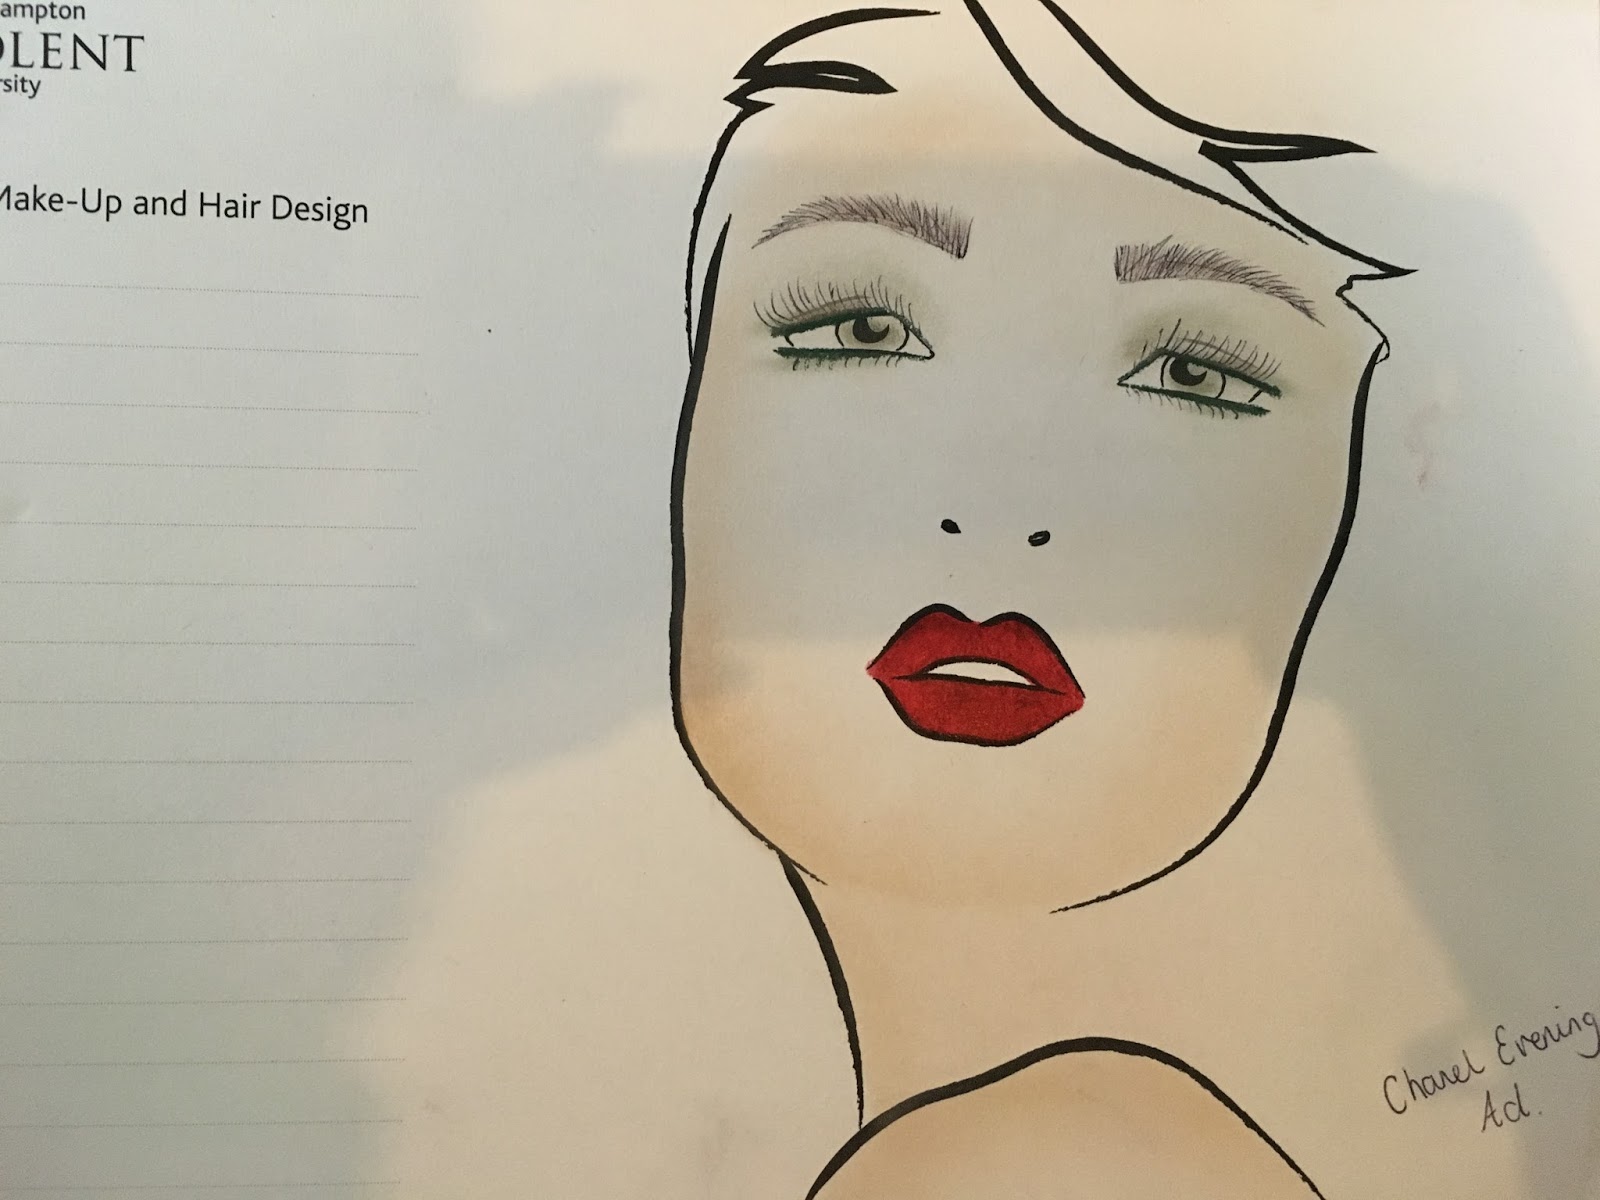
Advertising photo shoot- Evening Look
Face chart
Hair chart


MAKE-UP
- Garnier moisturiser
- Laura Mercier primer
- Maybelline foundation 60
- Kryolan make-up blend
- collection brightening under eye concealer
- Ben Nye banana powder
- Estee Lauder bronze goddess
- Illamasqua duo blush
- Illamaqua sculpting powder duo
- Revolution Radiant light highlighter
- Rimmel 3D mascara black
- Anastasia Beverly Hills Dip brow pomade medium brown
- Rimmel red diva lip liner
- Kyrolan mini lip palette
- Avon green pencil eyeliner
- Urban decay vice eye shadow palette green, silver
Steps
- First step was cleaning the face with toning water just to make sure the model face is make-up free. I then used a moisturiser all over the face and the neck. I then applied a primer to the face all over with my foundation brush, the skin is now ready for the application of make-up.
- I then applied the Amarni foundation all over the face for a light coverage. I used a darker shade of foundation and a lighter one to contour the face. This is to be able to give a light contour and sculpting of the face with the foundation. I applied the dark on the top of the forehead, cheekbones, chin, just under the jaw line and tip of the nose and side, I then applied the light on the centre of the forehead, under the eyes, below the cheekbones, centre of chin, eyelids and centre of the nose. I then placed a small amount of the make-up blend and squeezed brush, this helps to blend the foundation into each other and give a slight glow to the skin. Using the brush I blended it all in and worked it onto the ears and down the neck.
- Next was setting the foundation however this look is a little more dewy than the day look and also highlighting certain areas with the powder. I applied powder under the eyes, centre of the forehead and under the cheekbones. I then used my large powder brush to blend it in theses areas. The powder was minimal, its to set the look and use the powder to highlight the areas however I wanted more of a glowy evening look.
- I then used the bronzer with a large brush and put it gently on the forehead and cheeks, down the neck and onto the chest area slightly. I then used the sculpting powder and used my brush to define the cheekbones. I then went over the cheeks with the Illamasqua blusher which is a mix of a dark pink and bright pink which I put over the bronzer for an evening bronzed glow with a touch of pink for colour. Lastly on the skin was highlighting it which I used a fan brush and highlighted the center of the forehead, under brow, tops of cheekbones, down nose, cupids bows and chin.
- For the eyes I used a green pencil eyeliner and lined under the eyes and on top of the eyes however the line on top I created slightly thicker and brought it out from the corner of the eye. I then used a large eye shadow brush and used a grey/silver colour in the corner of the eye and over the lid. I then went over with a green shade and put it in the corner of the eye and over the lid. I then used a silver eyeshadow to blend the edges out so it wasn't so harsh and faded outwards just to the brow bone.
- I then went over the lashes with black mascara to give them length, thickness and to darken them. For the eyebrows I used a small amount of product and filled them in just to define then and give them depth and shape.
- Finally was the lips where I lined them with a red and then used the lip kit where I chose the dark pink/purple, raspberry like colour in LC010 for the lips and used my brush to blend it in with the liner.
HAIR
Equipment:
- paddle brush
- pin tail comb
- shine spray
- medium curling tongs
- hair spray
- clips
Steps:
- I started with brushing the hair through thoroughly to get any tangled or knots out. I pre heated the curlers so they were hot for when I needed to used them.
- I then sectioned the hair in half so half the hair was gripped up as my model had very thick hair.
- I then started curling the bottom taking large sections and making sure the curls are all flowing in the right direction to created the holly wood waves.
- I then let the top half of the hair down and worked my way round the head curling large sections and moving on round. Once I was at the front of the hair I curled the fringe to make a large ringlet fall down the side of the face.
- Once the whole head was curled I used the shine spray all over. I then got my paddle brush and brushed through the whole of the hair making them join into consistant waves around the head. I then used my comb and hair spray to keep the waves together and flow down the hair and keeping it all in place.


Some images from the shoot


Evening mood board

Advertising mood board

How the shoot went-
I was really happy with how the shoot went, I again felt like I got a good selection of images to choose from for post production. I was really happy with the outcome of the look, I was worried about the difference between the day and the evening and how I could make them look individual and one to look day and one to look like an 'evening' look. I feel I hit the brief on point with the evening look as there is a distinct difference in the look, styling, makeup, hair and over all theme. I chose the darker colours of the colour which I felt would suit an evening Chanel look. Again I arrived to the studio prior to the time booked and set up downstairs in the makeup room where the studios are. I then started on make-up and then moved onto doing the hair, the whole look took around 1 hour and half, the longest part was the hair because my model has thick hair. We then took our equipment and stuff in the studio where I set up while the model was getting into the black dress. I used one light for this look with a beauty dish so the light would be stronger in the center.
I was really happy with how the shoot went, I again felt like I got a good selection of images to choose from for post production. I was really happy with the outcome of the look, I was worried about the difference between the day and the evening and how I could make them look individual and one to look day and one to look like an 'evening' look. I feel I hit the brief on point with the evening look as there is a distinct difference in the look, styling, makeup, hair and over all theme. I chose the darker colours of the colour which I felt would suit an evening Chanel look. Again I arrived to the studio prior to the time booked and set up downstairs in the makeup room where the studios are. I then started on make-up and then moved onto doing the hair, the whole look took around 1 hour and half, the longest part was the hair because my model has thick hair. We then took our equipment and stuff in the studio where I set up while the model was getting into the black dress. I used one light for this look with a beauty dish so the light would be stronger in the center.
Did any problems occur on the day or during the shoot?-
I did not have any problems during creating the look or shooting. I feel the hair could of been a little sleeker with the holly wood waves as there were some fly away hairs. I started off with two lights however felt it was too bright and felt one with a beauty dish would be sufficient as I wanted the lighting a little dimmer for the evening feel. I started off with trying a white background however felt the atmosphere was too bright and I didn't get the evening vibe as it made everything bright. When previously finding more evening looks by Chanel the background tend to be darker on on a darker location. I then changed the backdrop to black and I felt this worked much better. Again my model was nervous so some stiffness around the mouth occurred during the shoot however in post production I will see if I can sort it out by evening the skin tone out and get rid of the shadows on the face. Overall the shoot went smoothly.
I did not have any problems during creating the look or shooting. I feel the hair could of been a little sleeker with the holly wood waves as there were some fly away hairs. I started off with two lights however felt it was too bright and felt one with a beauty dish would be sufficient as I wanted the lighting a little dimmer for the evening feel. I started off with trying a white background however felt the atmosphere was too bright and I didn't get the evening vibe as it made everything bright. When previously finding more evening looks by Chanel the background tend to be darker on on a darker location. I then changed the backdrop to black and I felt this worked much better. Again my model was nervous so some stiffness around the mouth occurred during the shoot however in post production I will see if I can sort it out by evening the skin tone out and get rid of the shadows on the face. Overall the shoot went smoothly.
Am I happy with the overall look-
I'm very pleased with the overall look and feel I used the s/s 16 Chanel collection very well in my make-up by using the correct colours from the collections to project the advertisement. I was worried about if it would look 'evening' however I can see a huge different in both ad images and I created by purely creating a different mood with a dark background, different clothing, sleek holly wood hair and using darker shades of make-up for the look. I'm very pleased with how it came out and I'm excited to start editing and adding in the products. I started off with my model in the black dress however the straps were very thin and it looked more in the way than being a part of the photograph so instead I took down the straps, oiled my models neck, shoulders, chest and arms and shot and the glow and refection was beautiful and I felt the bare skin was successful.
I'm very pleased with the overall look and feel I used the s/s 16 Chanel collection very well in my make-up by using the correct colours from the collections to project the advertisement. I was worried about if it would look 'evening' however I can see a huge different in both ad images and I created by purely creating a different mood with a dark background, different clothing, sleek holly wood hair and using darker shades of make-up for the look. I'm very pleased with how it came out and I'm excited to start editing and adding in the products. I started off with my model in the black dress however the straps were very thin and it looked more in the way than being a part of the photograph so instead I took down the straps, oiled my models neck, shoulders, chest and arms and shot and the glow and refection was beautiful and I felt the bare skin was successful.
Am I going to re-shoot-
Again because I used the same model she still looked a little tense and stiff so I have considered re-shooting this one also and possibly using a different model. However again I want to firstly see what I can do in photo shop where so of the tense shading on the face is and see if I can smooth parts out and equalise the skin tone to make it look natural. After some post production if its still not getting there or working out I will arrange to re-shoot but for the time being I'm extremely happy with the look and its outcome and really want to keep theses photos as my advertisement.
Again because I used the same model she still looked a little tense and stiff so I have considered re-shooting this one also and possibly using a different model. However again I want to firstly see what I can do in photo shop where so of the tense shading on the face is and see if I can smooth parts out and equalise the skin tone to make it look natural. After some post production if its still not getting there or working out I will arrange to re-shoot but for the time being I'm extremely happy with the look and its outcome and really want to keep theses photos as my advertisement.
No comments:
Post a Comment